Hour 026

This card is from SVS Visualizing Drawing in Perspective.

This lesson is a little different from a basic perspective lesson because it focuses on estimating and how to visualize objects in space. So we take a basic cube and look at it from above and below, then work on other shapes within the box like cylinders and spheres. One funny way to work with spheres is to draw faces on them so you can visualize how the eyes and mouth in particular will be different sizes and shapes as they wrap around the sphere. And it’s fun! 😀

Next time I will do this in photoshop so I can push my vanishing points out further and make the objects bigger. With working on paper, I have to keep the objects small, otherwise they get really distorted. I think actually at this point, I almost need to move to digital as my main learning tool just because of the flexibility, and practice both on paper and digitally.

Col-erase pencil on letter size copy paper.

I did 60 minutes going through the lessons and practice and then 45 minutes to complete this image.
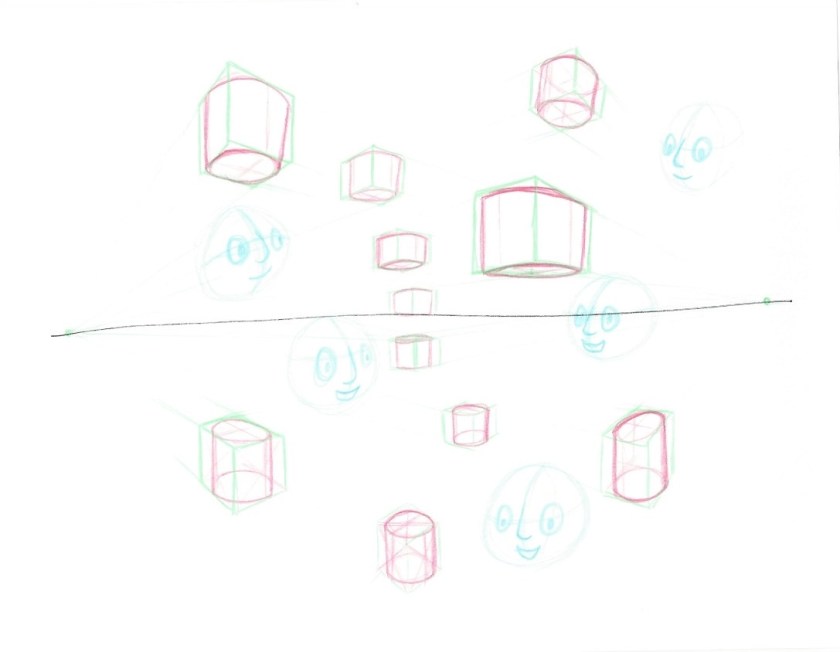
pencil sketches of boxes, cylinders and spheres with faces

Hour 025

This card is from SVS Learn Basic Perspective class.

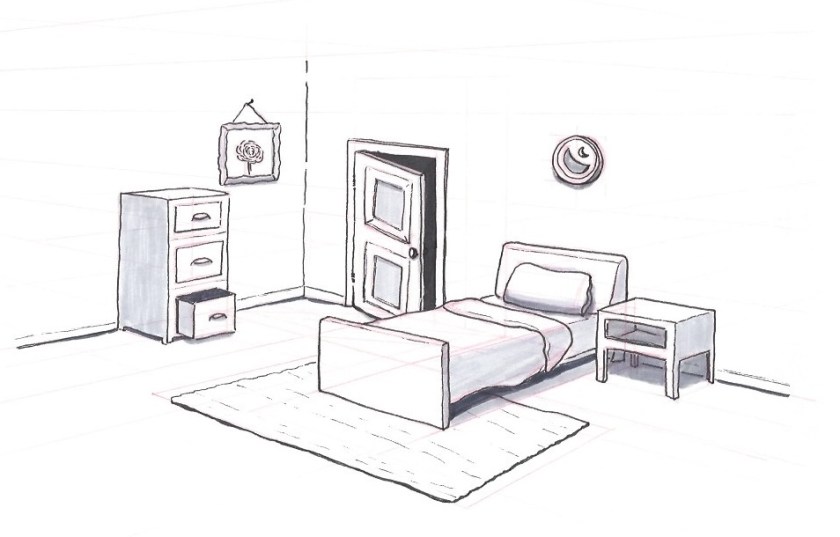
This lesson is about pulling everything together from class and making an illustration based on a given plan view and side elevations of an interior room. One of the big take aways here is that David says he starts every illustration by finding the vanishing points and making a perspective grid to work from. Then he progresses to basic boxes and squares in the grid, and only then starts adding details. I thought that many people would be able to internalize perspective and just wing it. But he says he starts from the grid. So I did the same. One of the hardest things for me, oddly maybe, is that it was hard to take the grid and then find how my illustration would fit into it. It took a few tries to get things into the right size and point in the illustration. I am ok with the result, but it seems very stiff and very plain to me.

Next time I will work harder on envisioning the full 3D space. I should have foreground elements based on my location. I even created the layout in Minecraft to get a better feel for it, so I can see those elements, but I didn’t include them because I wasn’t sure of how to figure them out on paper. It might be another thing that I have to figure out digitally with those tools which might make these easier to conceptualize.

Col-erase pencil and fine liner on letter size copy paper.

I spent about an hour to complete this image.

ink and marker sketch of an interior bedroom scene

Hour 024

This card is from SVS Learn Basic Perspective class.

This lesson is about how to draw ellipses in perspective. This is the first time I have looked at ellipses not just as ovals in a square, but actually looking at how the ellipse is a circle represented in 2D space. I have been trying to draw tires on cars for a while and I just don’t understand them, they are really hard for me to conceptualize. And because I don’t understand them, my drawings of tires are pretty bad! But this lesson gets into how to think about the circle as it rotates away from the viewer, and how you need to use the minor axis to find the major axis. It’s still very difficult for me, but I think it’s one of those things that will come with time and practice.

Next time I will do this lesson digitally so I can draw on top of a reference image and use the circle tools to check my work. Even though this is a drawing lesson, the bigger lesson for me is learning the concept and being able to see things better and understand it.

Ball point pen on letter size copy paper.

I did 45 minutes following the lesson, taking lots of notes and doing a few examples. I am stopping here because I really think I need to figure this out more digitally.

ballpoint pen sketch of cubes in perspective with ellipses drawn on them

Hour 023

This card is from SVS Learn Basic Perspective.

This lesson is covering the basics of 2 point perspective. Again, it’s mostly terms and quick excercises to learn the basics. One of the highlights is that for good cone of vision (meaning less distortion), one of your vanishing points can be on the page, but the other should be way off the page. The instructions suggested taping two papers together for it, and instead I just used a point on my desk, but I should have done the taping, that would have been easier in the long run.

I also did a bonus fun challenge of finding some Disney moving stills and finding the vanishing points in them. That was for fun.

Next time I will do this task in Photoshop, so it will be easier to stretch the canvas way out.

Ball point pen on letter size copy paper.

Procreate app on iPad for the stills.

I did 30 minutes to complete this image. And 30 minutes playing with movie stills in Procreate.

Boxes in a 2 point perspective grid

Hour 022

This card is from SVS How to Draw Everything.

This lesson is about the beginnings of rendering tone. On paper, I used hatching and different pencils and markers. This time around, I used just simple brushes and the lasso and fill tools in Photoshop. This actually took me a long time relatively since I’m still learning Photoshop. I’m still learning the keyboard shortcuts and tools. The actual examples were fairly easy, and I think the results are ok, but it is an intro lesson and I have a lot more to learn. There’s a light and shadow class coming up which goes more into depth.

Next time I will try to create more of a still life type of image so I can explore the cast shadows and interactions between objects. Although the point of this exercise is just an introduction. More in depth cards will come up soon

Photoshop using Huion tablet.

I took my time learning tools and trying things out, so this took about an hour to complete this image.

rows of boxes with colors and basic shadings